Hotpoint Gas Oven Manual: A Comprehensive Guide
This manual provides detailed instructions for Hotpoint gas oven operation, safety, maintenance, and troubleshooting. It covers various models, including RGBS400DMBB/DMWW and JGBP25GEN7, ensuring optimal performance and user safety.
Understanding Your Hotpoint Gas Oven
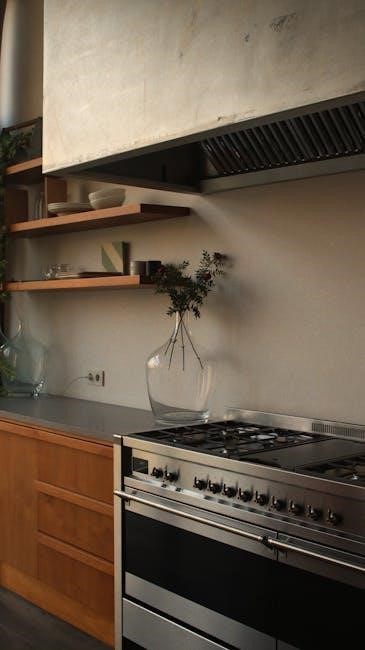
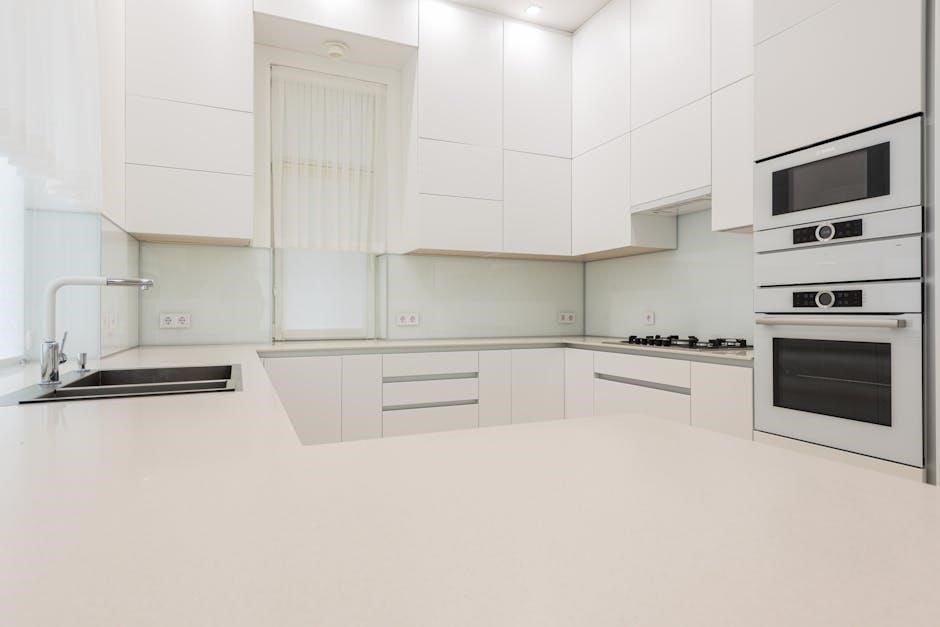
Hotpoint gas ovens offer a blend of traditional cooking with modern convenience. These ranges, including free-standing and built-in models, utilize gas for efficient heating, providing consistent temperatures for baking, broiling, and roasting.
Familiarize yourself with the specific features of your Hotpoint model, as variations exist. Many models boast fan-assisted cooking for even heat distribution and self-cleaning cycles for easy maintenance. Understanding the control panel, burner assembly, and oven interior is crucial for safe and effective operation. Always refer to your specific manual for detailed information regarding your Hotpoint gas oven.
Safety Precautions
Prioritize safety! This section details crucial precautions regarding gas leaks, carbon monoxide, and proper ventilation when using your Hotpoint gas oven.
Gas Leak Detection and Response
Recognizing a gas leak is critical for safety. If you smell gas, do not operate any electrical switches, as this could ignite the gas. Immediately extinguish all open flames and avoid using phones in the vicinity.
Open windows and doors to ventilate the area thoroughly. Turn off the gas supply at the main shut-off valve. Evacuate the premises and contact your local gas company or emergency services from a safe location.
Do not re-enter until a qualified technician has inspected the oven and confirmed it is safe to use. Regular checks for gas odors are recommended, especially after installation or maintenance.
Carbon Monoxide Awareness
Carbon monoxide (CO) is a colorless, odorless, and deadly gas produced by incomplete combustion of fuels like gas. A malfunctioning gas oven can release CO, posing a serious health risk. Install a CO detector near the oven and in central living areas, testing it regularly.
Symptoms of CO poisoning include headache, dizziness, nausea, and confusion. If you suspect CO poisoning, immediately evacuate the premises and call emergency services.
Ensure proper ventilation during oven use to prevent CO buildup. Never use the oven for heating your home, as this increases CO risk. Regular professional maintenance can minimize CO production.
Proper Ventilation
Adequate ventilation is crucial when operating your Hotpoint gas oven. Gas combustion requires oxygen and produces exhaust gases, including water vapor. Ensure the kitchen is well-ventilated during and after oven use to prevent moisture buildup and maintain air quality.
Use the oven’s exhaust hood or open windows to facilitate airflow. Avoid obstructing ventilation openings. Poor ventilation can lead to condensation, affecting oven performance and potentially causing corrosion.
Never operate the oven in a confined space without proper ventilation. Regular cleaning of the ventilation system ensures optimal airflow and efficient operation.

Oven Components & Features
Hotpoint gas ovens feature a control panel, burner assembly, oven racks, and a thermostat. These components work together to deliver precise temperature control and efficient cooking.
Control Panel Overview
The Hotpoint gas oven control panel is designed for intuitive operation. Key features include the oven mode selector – offering options like Bake, Broil, and potentially convection settings – and temperature control knobs for precise heating. Digital displays, present on some models, show set temperatures and remaining cook times.
Timer functions allow for programmed cooking, automatically shutting off the oven when the set duration expires. Indicator lights signal when the oven is preheated or actively heating. Safety lock features, if equipped, prevent accidental operation. Familiarizing yourself with these controls ensures efficient and safe oven usage.
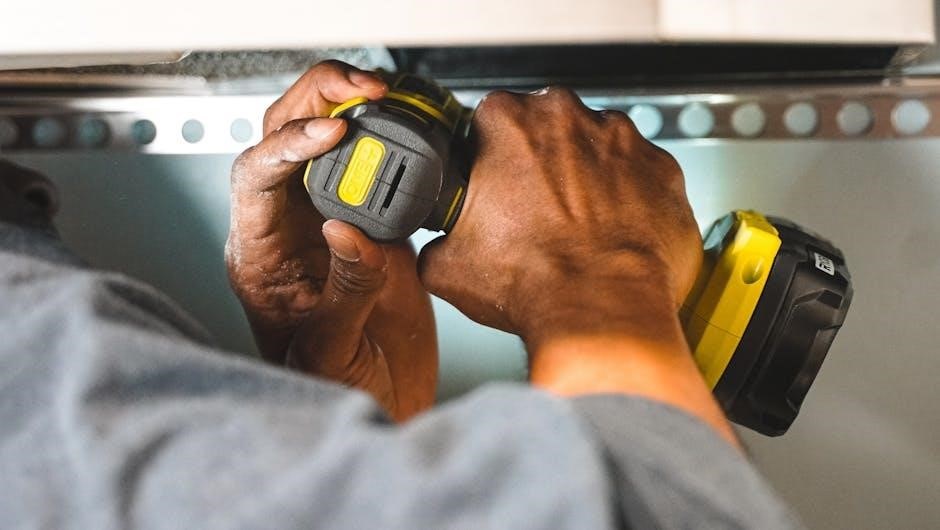
Burner Assembly & Ignition System
The Hotpoint gas oven’s burner assembly delivers the heat for cooking. It typically consists of one or more burners located at the oven’s base. The ignition system employs either a standing pilot light or an electronic igniter to initiate gas combustion. Electronic ignition uses a spark to ignite the gas, offering convenience and safety.
Proper burner function is crucial for even heating. Regular cleaning prevents blockages that can cause uneven flames or ignition failures. Inspect the burners for damage or corrosion. A faulty ignition system may require professional repair to ensure safe and reliable oven operation.
Oven Racks and Interior
The Hotpoint gas oven interior is designed for efficient heat circulation. Oven racks, typically adjustable, support cookware during baking and broiling. Proper rack placement is vital for even cooking; consult recipes for guidance. The interior surfaces may feature porcelain enamel for easy cleaning and durability.
Avoid using abrasive cleaners that can damage the enamel. Regularly inspect the racks for rust or damage, replacing them as needed. Ensure racks move freely within the guides. Do not cover the oven floor with foil, as this can trap heat and affect performance.
Temperature Control & Thermostat
Hotpoint gas ovens utilize a thermostat to regulate internal temperature. The control panel allows users to set desired baking or broiling temperatures. Accurate temperature is crucial for successful cooking; preheating is recommended. Thermostat calibration may be necessary over time to maintain accuracy.
Fluctuations in gas pressure can affect oven temperature. If baking results are inconsistent, consider verifying thermostat functionality. Avoid frequent opening of the oven door during baking, as this releases heat. Refer to the manual for specific temperature settings for various food types.

Operating Instructions
Follow these steps for safe and effective operation: lighting the oven, setting temperatures, utilizing bake/broil modes, and performing the self-cleaning cycle as needed.
Lighting the Oven
To light your Hotpoint gas oven, first ensure all burner ports are clear. Push and turn the oven control knob to the “Light” or “Bake” setting. Simultaneously, press and hold the ignition button. You should hear a clicking sound as the igniter sparks. Continue holding the ignition button for approximately 30-60 seconds, allowing the burner to ignite.
If the burner doesn’t light after this time, release the ignition button, wait five minutes to allow any accumulated gas to dissipate, and repeat the process. Never attempt to light the oven manually with a match or lighter. If repeated attempts fail, consult a qualified technician. Always observe the flame pattern to ensure consistent and even ignition.
Setting the Oven Temperature
To set the desired oven temperature, turn the oven control knob to the “Bake” setting. The knob is typically marked with temperature ranges, from warm to high heat; Rotate the knob to align the desired temperature with the indicator mark on the control panel.
Allow the oven to preheat fully before placing food inside. Preheating time varies depending on the set temperature, but generally takes 10-15 minutes. Monitor the oven during preheating to ensure it reaches the selected temperature. Some models feature a preheat indicator light. Accurate temperature setting is crucial for optimal cooking results.
Using Oven Modes (Bake, Broil, etc.)
Hotpoint gas ovens offer various cooking modes for versatile meal preparation. The “Bake” mode is ideal for general cooking, utilizing heat from the burner below. “Broil” uses intense top heat, perfect for browning and finishing dishes – always use the broil pan! Some models include a “Convection Bake” setting, circulating hot air for even cooking.
Refer to your specific model’s manual for detailed instructions on each mode. Ensure proper rack placement based on the chosen mode. Experiment with different settings to achieve desired results. Many Hotpoint ranges include features like fan-assisted cooking.
Self-Cleaning Cycle Operation
Hotpoint gas ovens with self-cleaning functionality offer a convenient way to maintain a pristine interior. Before initiating the cycle, remove racks, cookware, and any loose debris. Ensure the oven door can lock securely. Select the self-clean cycle on the control panel, choosing the desired cleaning duration – typically 2-4 hours.
The oven will heat to a high temperature, burning off food residue. A strong odor may be present during operation; ensure adequate ventilation. Once complete, allow the oven to cool completely before removing ash. Regular cleaning extends oven life.
Troubleshooting Common Issues
This section addresses frequent problems like heating failures, uneven baking, ignition difficulties, and lingering gas odors, offering solutions for Hotpoint gas oven owners.
Oven Not Heating
If your Hotpoint gas oven isn’t heating, first ensure the gas supply is active and the oven is properly connected. Check the igniter; a visible glow indicates it’s attempting to light, but a lack of glow suggests a faulty igniter needing replacement.
Verify the oven’s temperature settings and ensure it’s not in a ‘delay start’ or ‘off’ mode. A malfunctioning thermostat can also prevent heating, requiring professional diagnosis. Inspect the burner assembly for obstructions or damage. Always disconnect the gas supply before inspecting components. If issues persist, contact a qualified technician for safe and effective repair.
Uneven Baking
Experiencing uneven baking in your Hotpoint gas oven? Several factors could be at play. Ensure oven racks are positioned correctly and not overcrowded, allowing for proper heat circulation. Verify the oven thermostat is calibrated accurately; an inaccurate thermostat leads to temperature inconsistencies.
Check for obstructions blocking the burner or vent, hindering even heat distribution. Rotate baking sheets midway through cooking for more uniform results. Avoid opening the oven door frequently during baking, as this disrupts temperature stability. If problems continue, professional calibration or repair may be necessary.
Ignition Problems
Difficulty igniting your Hotpoint gas oven? First, ensure the gas supply is turned on. A common cause is a dirty or blocked burner port; carefully clean the burner assembly with a wire brush. Check the igniter – if it’s not glowing, it may need replacement.
Verify the oven’s safety valve is functioning correctly. A faulty igniter or valve requires professional attention. Never attempt to repair gas components yourself. If the issue persists after cleaning, contact a qualified technician for diagnosis and repair to prevent potential gas leaks.
Gas Smell Persisting
Detecting a persistent gas odor is a serious safety concern. Immediately extinguish any open flames and avoid operating electrical switches. Do not attempt to locate the source yourself. Open windows and doors to ventilate the area thoroughly.
Evacuate the premises and contact your local gas company or emergency services from a safe location. Do not re-enter until a professional has confirmed the area is safe. Recent recalls highlight the importance of immediate action; identify if your Hotpoint model is affected.

Maintenance & Cleaning
Regular cleaning and maintenance ensure optimal performance and longevity of your Hotpoint gas oven. This includes cleaning the interior, burners, and replacing the oven light as needed.
Cleaning the Oven Interior
Maintaining a clean oven interior is crucial for efficient cooking and preventing unpleasant odors. For standard cleaning, allow the oven to cool completely before wiping down surfaces with warm, soapy water. Avoid abrasive cleaners, as they can damage the enamel coating.
For baked-on spills, create a paste of baking soda and water, apply it to the affected areas, and let it sit for several hours or overnight. Then, scrub gently and rinse thoroughly; Hotpoint models with a self-cleaning cycle offer a convenient alternative; however, always follow the specific instructions outlined in the oven’s manual before initiating this process. Remember to remove racks and accessories before self-cleaning.
Cleaning the Burners
Regularly cleaning the burners ensures optimal gas flow and efficient oven performance. Begin by ensuring the oven is completely cool and the gas supply is turned off. Remove the burner caps and heads, then wash them in warm, soapy water. Use a non-abrasive brush to remove any food debris from the burner ports.
For stubborn blockages, a thin wire or needle can be carefully used to clear the ports. Rinse thoroughly and allow all parts to dry completely before reassembling. Inspect the burner base for any accumulated debris and clean as needed. Properly cleaned burners contribute to consistent heating and prevent uneven cooking.
Replacing the Oven Light
Replacing the oven light is a straightforward process. First, disconnect the power to the oven at the circuit breaker. Locate the oven light cover, usually at the back of the oven interior, and remove it. Carefully unscrew the old light bulb – it may be hot, even if the oven is off.
Ensure you use a bulb with the correct wattage, as specified in the oven’s specifications. Screw in the new bulb securely, replace the light cover, and restore power. A functioning oven light enhances visibility during cooking and allows for easy monitoring of food.
Regular Maintenance Schedule
Maintaining your Hotpoint gas oven ensures longevity and optimal performance. Monthly, clean the oven door and control panel. Every three months, thoroughly clean the oven interior, including racks, and inspect burner ports for blockages. Twice a year, check the gas connection for leaks (use soapy water) and verify proper ventilation.
Annually, consider a professional inspection of the ignition system and thermostat. Regularly replacing the oven light bulb and keeping the exterior clean contribute to a safe and efficient cooking experience. Following this schedule prevents issues and extends the oven’s lifespan.
Specific Hotpoint Gas Oven Models
This section details instructions for specific Hotpoint gas oven models, like RGBS400DMBB/DMWW, JGBP25GEN7, 9878810, and 9888810, offering tailored guidance.
Hotpoint RGBS400DMBB/DMWW Manual Details
The Hotpoint RGBS400DMBB and RGBS400DMWW are 30-inch free-standing gas ranges featuring standard cleaning capabilities. This model’s manual emphasizes proper installation, ensuring gas connections are secure to prevent leaks. Users should familiarize themselves with the control panel, understanding bake, broil, and cleaning cycle settings.
Detailed instructions cover lighting the oven, setting temperatures accurately, and utilizing oven racks for optimal baking. The manual also provides guidance on self-cleaning cycle operation, stressing safety precautions during high-heat cleaning. Regular maintenance, including burner cleaning, is highlighted for longevity and performance. Refer to the manual for specific error code explanations and troubleshooting steps.
Hotpoint JGBP25GEN7 Specifics
The Hotpoint JGBP25GEN7 gas range manual details its features, including various oven modes for versatile cooking. Users are guided through the lighting process and temperature setting procedures, ensuring accurate cooking results. The manual stresses the importance of proper ventilation during operation to prevent carbon monoxide buildup.
Specific attention is given to the self-cleaning cycle, outlining safety measures and recommended usage. Troubleshooting sections address common issues like ignition problems and uneven baking, offering solutions for optimal performance. Regular cleaning of burners and the oven interior is emphasized for longevity. Always consult the manual for error code definitions and warranty information.
Hotpoint 9878810 & 9888810 Model Information
These Hotpoint models, 9878810 and 9888810, share similar operational guidelines detailed in the comprehensive gas oven manual. Users will find instructions on safely lighting the oven, setting precise temperatures, and utilizing available cooking modes. The manual emphasizes regular maintenance, including burner cleaning and oven interior upkeep, to ensure optimal performance and longevity.
Troubleshooting guides address common issues like heating problems and gas smells, providing step-by-step solutions. Important safety precautions regarding gas leak detection and carbon monoxide awareness are prominently featured. Refer to the manual for specific component details and warranty coverage information for these models.
Understanding Error Codes
The Hotpoint gas oven manual details common error code meanings, assisting users in diagnosing issues. Resetting these codes often requires a power cycle or specific button combinations.
Common Error Code Meanings
Hotpoint gas oven error codes signal specific malfunctions, aiding in quick diagnosis. An “F1” or “E1” code often indicates an ignition failure, potentially due to a faulty igniter or gas supply issue. “F2” or “E2” typically points to a flame failure, suggesting a problem with the flame sensor.

Codes like “F3” or “E3” can signify temperature sensor errors, impacting accurate baking. Other codes may relate to control board issues or gas valve problems. Consult your specific model’s manual for a complete list and detailed explanations, as code meanings can vary. Ignoring these codes can lead to further damage or unsafe operation.
Resetting Error Codes
Resetting Hotpoint gas oven error codes often involves disconnecting the oven from its power source for several minutes. This allows the control board to clear its memory. After disconnecting, restore power and attempt to restart the oven.
For some models, a specific reset procedure might be outlined in the user manual – often involving pressing and holding certain buttons on the control panel. If the error persists after resetting, it indicates a more serious underlying issue requiring professional attention. Do not repeatedly attempt resets, as this could worsen the problem.

Warranty Information
Hotpoint offers warranty coverage on gas ovens, varying by model. Contact Hotpoint customer support for specific details regarding your appliance’s coverage period and terms.
Hotpoint Warranty Coverage
Hotpoint gas oven warranties typically cover defects in materials and workmanship for a specified period from the date of original purchase. The standard warranty often includes one year for parts and labor. Extended warranties may be available for purchase, offering additional coverage for a longer duration.
Coverage generally applies to components that fail during normal household use. It does not cover damage resulting from misuse, improper installation, accidents, or natural disasters. Proof of purchase is required to validate any warranty claim. Specific terms and conditions can vary based on the model and purchase location, so reviewing your warranty documentation is crucial.
Contacting Hotpoint Customer Support
For assistance with your Hotpoint gas oven, customer support is readily available through multiple channels. You can reach them via phone at the number listed in your owner’s manual or on the Hotpoint website. Online support, including FAQs and live chat, is also accessible.
Their website provides a platform for submitting service requests and locating authorized repair technicians in your area. When contacting support, have your model number and serial number readily available to expedite the process. Be prepared to describe the issue in detail for efficient troubleshooting and resolution.
Gas Cooker Recall Information (Important Safety Update)
Hotpoint and Indesit have issued a recall for certain gas cookers due to potential gas leaks; immediately cease use if your model is affected.
Identifying Affected Models
Determining if your Hotpoint gas cooker is part of the safety recall requires careful model number verification. Affected models include Hotpoint Range/Stove/Oven 9878810 and 9888810, as well as Hotpoint Range/Stove/Oven JGBP25GEN7.
Additionally, Hotpoint 30 Free-Standing Standard Clean Gas Range RGBS400DMBB and RGBS400DMWW are potentially impacted. Locate the model number typically found on a sticker on the rear of the appliance or inside the oven door.
If you are unsure, consult the official Hotpoint recall website or contact customer support with your appliance details for confirmation. Prioritize safety and verify your model immediately.
Steps to Take if Your Model is Affected
If your Hotpoint gas cooker model is identified as affected by the recall, immediately stop using the appliance. Do not attempt to repair it yourself.
Contact Hotpoint customer support to arrange for a free repair by a qualified engineer; They will guide you through the process and schedule a convenient appointment.
Do not use the oven or hob until it has been professionally inspected and repaired; Ensure adequate ventilation in the kitchen while awaiting repair. Prioritize safety and follow Hotpoint’s instructions carefully.