Kenmore Elite Refrigerator: A Comprehensive User Manual
Welcome! This detailed manual assists with your Kenmore Elite Refrigerator, offering guidance for optimal performance and ensuring a seamless user experience from setup to maintenance.
Congratulations on selecting a Kenmore Elite Refrigerator – a testament to quality and innovation in home appliances! This refrigerator is designed to provide years of dependable service, keeping your food fresher for longer and simplifying your daily life. This manual serves as your comprehensive guide, walking you through every aspect of your new appliance, from initial setup and operation to cleaning and troubleshooting.

We understand that a new appliance can sometimes seem daunting. Therefore, we’ve structured this manual to be clear, concise, and easy to follow. Before you begin, please take a few moments to familiarize yourself with the contents. Pay close attention to the Safety Precautions section to ensure safe and proper operation. This refrigerator boasts advanced features, including precise temperature control, an efficient ice and water dispenser, and thoughtfully designed interior storage. We are confident that you will enjoy the convenience and performance of your Kenmore Elite Refrigerator for years to come!
Safety Precautions & Important Warnings
Important Safety Instructions: Your safety is paramount. Before operating your Kenmore Elite Refrigerator, carefully read and understand these precautions. Always disconnect the refrigerator from the power supply before cleaning or performing maintenance. Never use flammable sprays or solvents near the appliance, as they pose a fire hazard.

Do not attempt to repair the refrigerator yourself; contact qualified service personnel for assistance. Ensure the power cord is not damaged and is properly grounded. Avoid overloading electrical outlets. Keep ventilation openings clear of obstructions to prevent overheating. Warning: Electrical shock hazard – do not operate with wet hands. This appliance is intended for household use only. Improper use could void the warranty and potentially cause harm. Children should be supervised to ensure they do not play with the appliance. Dispose of the refrigerator responsibly, following local regulations.
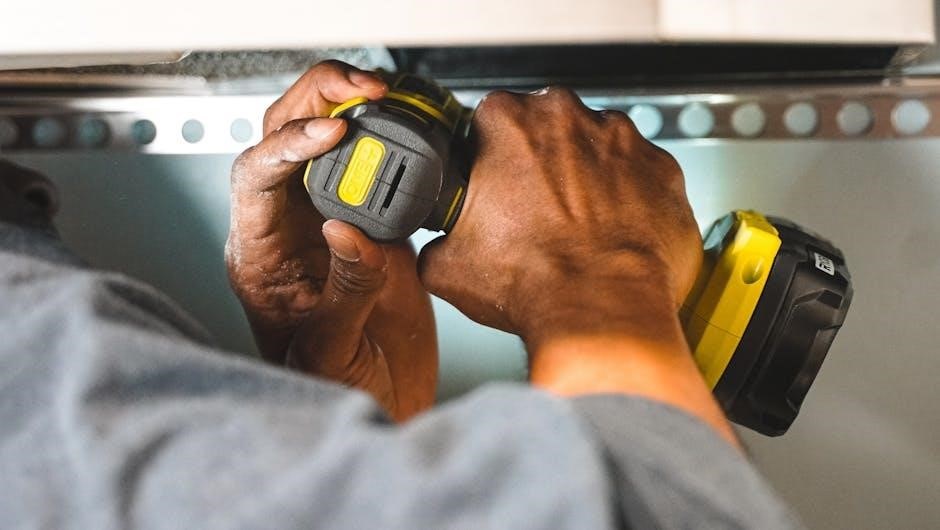
Unpacking and Initial Setup
Initial Setup Guide: Upon delivery, carefully inspect your Kenmore Elite Refrigerator for any shipping damage. Retain all packaging materials until you are satisfied with the appliance’s condition. Gently remove the protective film and any packing materials from both the interior and exterior.

Before plugging in the refrigerator, ensure it is placed on a level surface. Use a level to verify, and adjust the leveling feet as needed (see Leveling the Refrigerator section). Clean the interior with a mild detergent and warm water. Allow the refrigerator to stand upright for at least four hours before connecting it to a power supply. This allows the refrigerant to settle. Once stable, connect the refrigerator to a dedicated, grounded electrical outlet. Do not use extension cords. Finally, allow several hours for the refrigerator to reach its optimal operating temperature.
Removing Packaging Materials
Careful Unpacking: Begin by carefully cutting and removing the outer cardboard packaging. Inspect the refrigerator for any visible damage incurred during shipping before fully removing all materials. Retain the packaging for a short period, in case a return or exchange is necessary.

Next, remove all internal packing materials, including foam supports, tape, and plastic wrap. Pay close attention to any materials securing the shelves, drawers, and ice maker components. Gently lift and remove these items, ensuring no small parts are left behind. Dispose of all packaging responsibly, following local recycling guidelines. Finally, wipe down the interior surfaces with a soft, damp cloth to remove any dust or residue from the packaging process.
Leveling the Refrigerator
Ensuring Stability: Proper leveling is crucial for optimal refrigerator performance. Use a level to check both the front-to-back and side-to-side alignment. Most Kenmore Elite refrigerators feature adjustable front leveling feet. To adjust, gently turn the feet clockwise to raise that side, and counter-clockwise to lower it.
Continue adjusting the feet until the refrigerator is perfectly level and doesn’t rock. A slightly forward tilt can be beneficial, allowing doors to close automatically. If your floor is uneven, you may need to use shims under the leveling feet for added stability. Regularly check the leveling, especially after moving the refrigerator. An unleveled refrigerator can cause excessive noise and door sealing issues, impacting cooling efficiency.
Connecting to Power Supply
Powering Up Safely: Before connecting your Kenmore Elite refrigerator to the power supply, ensure the voltage matches the specifications listed on the appliance’s rating plate – typically located inside the refrigerator compartment. It’s highly recommended to plug the refrigerator directly into a dedicated, grounded electrical outlet. Avoid using extension cords or adapters, as they can pose a safety hazard and may not provide sufficient power.
Once connected, allow the refrigerator several hours to reach its optimal operating temperature. Avoid frequently opening the doors during this initial cooling period. Verify the power indicator light illuminates, confirming a successful connection. If the refrigerator doesn’t power on, check the circuit breaker or fuse box. Always disconnect the power supply before performing any maintenance or cleaning.
Understanding Refrigerator Features
Exploring Your Appliance: Your Kenmore Elite refrigerator is designed with advanced features for optimal food preservation and convenience. Familiarize yourself with the intuitive control panel, which allows precise temperature adjustments and activation of special functions like Quick Cool and Freeze.
Inside, you’ll discover thoughtfully designed interior components, including adjustable shelves and crisper drawers, maximizing storage flexibility. The spacious door bins and specialized compartments offer dedicated storage for bottles, condiments, and dairy products. Many models feature a humidity control system within the crisper drawers, extending the freshness of produce. Take time to explore these features to fully utilize your refrigerator’s capabilities.
Control Panel Overview
Navigating the Interface: The control panel is your central hub for managing refrigerator settings. It typically features a digital display showing current temperatures for both the refrigerator and freezer compartments. Touch controls or buttons allow you to adjust these temperatures with precision. Dedicated icons activate features like Quick Cool, rapidly lowering the refrigerator temperature for newly added groceries, and Quick Freeze, ideal for preserving food for longer periods.
Some models include a dispenser lock function, preventing accidental water or ice dispensing. An alarm indicator will alert you to temperature fluctuations or door ajar situations. Refer to the panel’s specific layout in your model’s diagram for precise button functions and indicator meanings. Understanding these controls ensures optimal performance and food preservation.
Interior Components & Shelving
Maximizing Space: Your Kenmore Elite refrigerator boasts thoughtfully designed interior components. Adjustable shelves, often made of spill-proof glass, allow customization to accommodate items of varying heights. Sliding shelves provide easy access to items stored at the back. The humidity-controlled crisper drawers are designed to keep fruits and vegetables fresher for longer by regulating moisture levels.
A full-width pantry drawer offers ample space for larger items like deli trays or pizza boxes. LED lighting illuminates the interior, making it easy to see contents. Some models feature a wine rack or specialized compartments. Proper arrangement of these components maximizes storage efficiency and ensures optimal air circulation for consistent cooling throughout the refrigerator.
Door Bins and Storage Options
Versatile Door Storage: The doors of your Kenmore Elite refrigerator are equipped with a variety of bins designed for optimal organization. Adjustable door bins allow you to customize the space to fit bottles, jars, and cartons of different sizes. Tall bottle bins securely hold large containers, while gallon door bins are ideal for milk jugs and juice.
A dairy compartment, often located on the top shelf, provides a consistent temperature for butter and cheese. Some models include a covered door bin for storing deli meats and snacks. Utilizing these door bins efficiently frees up valuable shelf space inside the refrigerator. Remember to avoid storing heavy items in the upper bins to prevent strain on the door hinges.
Temperature Control & Settings
Precise Temperature Management: Your Kenmore Elite refrigerator features advanced temperature control settings for both the refrigerator and freezer compartments. The digital control panel allows for precise adjustments, ensuring optimal food preservation. Recommended refrigerator temperature is between 37°F (3°C) and 40°F (4°C), while the freezer should be set to 0°F (-18°C).
Independent Controls: Each compartment has its own dedicated temperature control. Adjustments should be made gradually, allowing 24 hours for the temperature to stabilize. Utilize the temperature display to monitor the current settings. The Quick Cool/Freeze functions rapidly lower the temperature, ideal for newly added groceries or freezing items quickly.
Adjusting Refrigerator Temperature
Setting Your Ideal Temperature: To adjust the refrigerator temperature, locate the “Refrigerator Temp” control on the digital control panel. Press the “Refrigerator Temp” button repeatedly to cycle through the available temperature settings. Each press will typically adjust the temperature by 1°F (0.5°C). The display will show the selected temperature.
Optimal Range: For best results, maintain a refrigerator temperature between 37°F (3°C) and 40°F (4°C). Avoid setting the temperature too low, as this can cause food to freeze. Allow up to 24 hours for the temperature to stabilize after making adjustments. Monitor the temperature using a refrigerator thermometer for accurate readings. Remember to consider food storage guidelines when selecting your preferred temperature.
Adjusting Freezer Temperature
Maintaining Optimal Freezing: To adjust the freezer temperature, use the “Freezer Temp” control on the digital control panel. Press the “Freezer Temp” button repeatedly to cycle through the available temperature settings. Each press generally adjusts the temperature by 1°F (0.5°C), displayed clearly on the panel.
Recommended Settings: A freezer temperature of 0°F (-18°C) is generally recommended for optimal food preservation. Avoid setting the temperature warmer than this, as it may compromise food quality and safety. Like the refrigerator, allow up to 24 hours for the freezer temperature to stabilize after any adjustments. Regularly check the temperature with a freezer thermometer to ensure consistent performance and proper food storage.
Using the Quick Cool/Freeze Functions
Rapid Temperature Reduction: Your Kenmore Elite refrigerator features “Quick Cool” and “Quick Freeze” functions designed for rapidly cooling newly added groceries or freezing fresh items. To activate “Quick Cool,” press the corresponding button on the control panel; this lowers the refrigerator temperature for a set period, typically a few hours.
Optimizing Freshness: For “Quick Freeze,” press its designated button, which significantly lowers the freezer temperature. These functions automatically deactivate after a predetermined time, returning the compartments to their previously set temperatures. Remember to deactivate manually if desired. Utilizing these features is ideal when introducing a large quantity of warm items, preserving freshness and preventing temperature fluctuations that could affect existing contents.

Ice and Water Dispenser Operation
Convenient Access: Your Kenmore Elite refrigerator provides convenient access to chilled water and ice through the external dispenser. Before first use, ensure the water line is properly connected and the water filter is installed – crucial for optimal water quality and dispenser function. To dispense water, firmly press a glass against the paddle; to dispense ice, press against the ice dispense lever.
Dispenser Settings: Some models offer settings to select crushed or cubed ice. Regularly check the ice bin to prevent overflow. If the dispenser isn’t working, verify the water supply is on and the filter isn’t clogged. Proper maintenance, including regular filter replacement, ensures consistent performance and prevents potential issues with the ice maker and water dispenser systems.
Initial Water Filter Installation
Essential First Step: Before enjoying filtered water, install the water filter. Locate the filter compartment, typically within the refrigerator base grille or upper right corner. Gently remove the protective cap from the new filter. Align the filter with the housing, ensuring it clicks securely into place. Important: Flush the system by dispensing at least 2 gallons of water through the dispenser.
This initial flush removes air and any loose particles from the filter and water line. Discard this initial water; The water may appear cloudy initially – this is normal and will clear with continued use. Proper installation guarantees clean, fresh-tasting water. Refer to the filter packaging for specific model instructions and replacement recommendations.
Replacing the Water Filter
Maintain Water Quality: Replace the water filter every six months, or sooner if water flow diminishes. Locate the filter compartment (usually in the base grille). To remove the old filter, gently twist it counterclockwise and pull it straight out – a small amount of water spillage is normal, so have a towel ready.
Remove the protective cap from the new filter and lubricate the O-rings with water. Align the new filter with the housing and twist clockwise until it locks into place. After replacement, flush the system by dispensing water for approximately 2-3 gallons. This removes air and any carbon fines. Discard the flushed water. Regular filter changes ensure optimal water purity and dispenser performance.
Troubleshooting Ice Maker Issues
No Ice Production? First, ensure the ice maker is switched ‘on’ within the freezer compartment. Verify the water supply line is connected and the water supply valve is fully open. Check if the freezer temperature is at or below 0°F (-18°C) – ice production slows at warmer temperatures.
If ice is jammed, carefully remove the ice bin and dislodge any obstructions. A clogged water inlet valve can also prevent ice making; inspect and clean it if necessary. If the issue persists, try resetting the ice maker by turning it off for 24 hours and then back on. For continued problems, consult a qualified technician, as it may indicate a more complex mechanical failure requiring professional attention.
Cleaning and Maintenance

Regular cleaning ensures optimal performance and longevity of your Kenmore Elite Refrigerator. Interior cleaning should occur monthly; remove all shelves and drawers, wash them with warm, soapy water, and dry thoroughly before replacing. Wipe down interior surfaces with a baking soda solution (1 tablespoon per quart of water) to neutralize odors.
For the exterior, use a stainless steel cleaner specifically designed for appliances to prevent streaks and maintain shine. Condenser coils, located at the back or bottom of the refrigerator, should be cleaned every six months using a vacuum cleaner with a brush attachment to remove dust and debris, improving cooling efficiency. Always disconnect power before cleaning the condenser coils.
Interior Cleaning Procedures
Begin by disconnecting the refrigerator from the power supply. Remove all food items, shelves, drawers, and bins. Wash removable parts with warm water and mild dish soap; avoid abrasive cleaners. Rinse thoroughly and allow to air dry or wipe with a clean cloth.
For the refrigerator’s interior surfaces, prepare a solution of one tablespoon of baking soda dissolved in one quart of warm water. This effectively neutralizes odors and cleans gently. Wipe down all interior walls, door seals, and the ceiling with a soft cloth dampened with the baking soda solution. Rinse with clean water and dry completely before restocking with food. Pay close attention to spills, cleaning them immediately to prevent staining and odor buildup.
Exterior Cleaning & Stainless Steel Care
To maintain the pristine appearance of your Kenmore Elite refrigerator’s exterior, regular cleaning is essential. Begin by wiping down the doors, sides, and top with a soft cloth dampened with warm water and mild dish soap. Avoid abrasive cleaners, as they can scratch the surface.
For stainless steel models, use a stainless steel cleaner specifically designed for appliances. Apply the cleaner to a microfiber cloth and wipe in the direction of the grain. This prevents streaks and maintains the finish. Rinse with a clean, damp cloth and dry thoroughly. Avoid using chlorine bleach or scouring pads, as these will damage the stainless steel. Regularly polishing the exterior will help prevent fingerprints and smudges, keeping your refrigerator looking its best.
Condenser Coil Cleaning
Maintaining clean condenser coils is crucial for your Kenmore Elite refrigerator’s efficiency. Located on the back or bottom of the unit, these coils dissipate heat. Dust and debris accumulation forces the refrigerator to work harder, increasing energy consumption. Unplug the refrigerator before cleaning.
Use a vacuum cleaner with a brush attachment to gently remove dust from the coils. A long, narrow brush can help reach tight spaces. Alternatively, a condenser coil brush (available at appliance stores) is ideal. Avoid bending the coils during cleaning. Clean the coils at least twice a year, or more frequently if you have pets or live in a dusty environment. Regular cleaning ensures optimal performance and extends the life of your refrigerator.
Troubleshooting Common Problems
Encountering issues with your Kenmore Elite refrigerator? This section addresses frequent concerns. If the refrigerator isn’t cooling, check the power supply, temperature settings, and ensure the condenser coils are clean. For an ice maker failing to produce ice, verify the water supply line is connected and not frozen, and the freezer temperature is sufficiently low.
Water dispenser problems often stem from a clogged water filter or a frozen water line. Replace the filter regularly. If issues persist, consult the detailed sections on ice maker and water dispenser operation. If these steps don’t resolve the problem, record the model number and serial number, then contact Kenmore customer support for further assistance. Don’t attempt repairs yourself, as this could void the warranty.
Refrigerator Not Cooling
If your Kenmore Elite refrigerator isn’t cooling effectively, begin by verifying the power cord is securely plugged into a functioning outlet. Next, check the temperature control settings; ensure they haven’t been accidentally adjusted to a warmer setting. Inspect the condenser coils located at the back or bottom of the refrigerator – dust and debris accumulation restricts airflow, hindering cooling performance.
A blocked vent inside the refrigerator can also cause cooling issues. Ensure items aren’t obstructing the vents. Confirm the door seals are clean and creating a tight seal; compromised seals allow warm air to enter. If the problem persists after these checks, there might be a compressor or refrigerant issue, requiring professional service. Do not attempt to repair these components yourself.

Ice Maker Not Producing Ice
If your Kenmore Elite refrigerator’s ice maker isn’t functioning, first confirm the ice maker is switched ‘on’. Locate the on/off switch, usually within the ice maker compartment. Verify the water supply line is connected and the water supply valve is fully open. A frozen water line can also prevent ice production; check for any kinks or ice blockages.
Ensure the freezer temperature is set to 0°F (-18°C) or lower, as warmer temperatures can inhibit ice production. Check the ice bin isn’t full; a full bin will signal the ice maker to stop. If issues continue, the water inlet valve might be faulty, or the ice maker itself may require professional attention. Avoid using sharp objects to dislodge ice, as this can cause damage.
Water Dispenser Issues
Experiencing problems with your Kenmore Elite refrigerator’s water dispenser? First, ensure the water supply line is properly connected and the shut-off valve is fully open. A clogged water filter is a common culprit; replace it according to the recommended schedule (typically every six months). Low water pressure can also cause weak water flow – check your home’s water pressure.
If the dispenser is dripping, inspect the dispenser nozzle for any debris or damage. A frozen water line can restrict water flow; try gently thawing it with a hairdryer (on a low setting). If the dispenser isn’t working at all, the water inlet valve might be defective, requiring professional repair. Always use a clean glass to avoid contaminating the water system.
Warranty Information & Customer Support
Your Kenmore Elite Refrigerator is covered by a comprehensive warranty, protecting against defects in materials and workmanship. The standard warranty period is one year for parts and labor, with an extended warranty available for purchase offering additional coverage. Please retain your proof of purchase, as it is required for all warranty claims.

For warranty service or assistance, contact Kenmore’s customer support team. You can reach us via phone at 1-800-4MY-HOME (1-800-469-4663) or online through our website at www.kenmore.com. Our dedicated representatives are available to answer your questions, troubleshoot issues, and schedule service appointments. We are committed to providing excellent customer support and ensuring your satisfaction with your Kenmore Elite appliance.