Nikon Coolpix P500 Manual: A Comprehensive Guide
This guide provides a detailed overview of the Nikon Coolpix P500‚ assisting users in maximizing its features and achieving optimal photographic results.
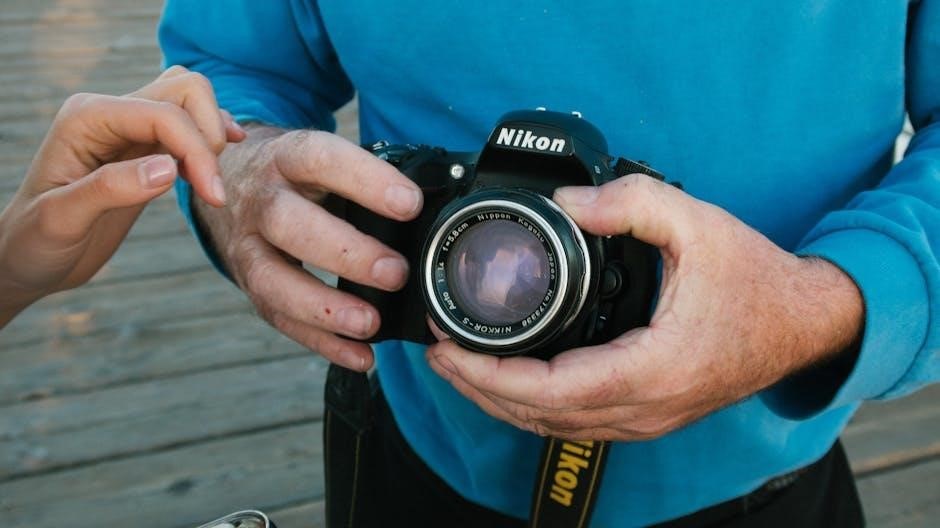
Welcome to the world of the Nikon Coolpix P500! This powerful compact camera‚ released in 2011‚ offers a remarkable blend of versatility and performance. As Nikon strengthened its COOLPIX Performance range‚ the P500 emerged as a standout model‚ boasting a substantial 22.2x optical zoom and advanced features packed into a relatively small body.
This manual serves as your comprehensive companion‚ designed to guide you through every aspect of your P500‚ from initial setup to mastering advanced shooting techniques. Whether you’re a beginner or an experienced photographer‚ this resource will unlock the full potential of your camera‚ enabling you to capture stunning images and videos with ease. Prepare to explore a world of creative possibilities!
Key Features and Specifications
The Nikon Coolpix P500 is renowned for its impressive specifications. It features a 12.2-megapixel CCD sensor‚ delivering detailed and vibrant images. The standout feature is its exceptional 22.2x optical zoom lens‚ providing incredible reach for capturing distant subjects. It also incorporates Nikon’s Vibration Reduction (VR) system‚ minimizing blur caused by camera shake.
Furthermore‚ the P500 records HD video (720p)‚ allowing you to preserve memories in motion. Connectivity options include USB and HDMI‚ facilitating easy image transfer and viewing on external displays. Its various shooting modes cater to diverse scenarios‚ while manual controls offer creative flexibility. This compact powerhouse delivers a compelling photographic experience.

Getting Started with Your P500
Begin your photographic journey by preparing your Nikon Coolpix P500 for use‚ ensuring all components are present and understanding initial setup procedures.
Unboxing and Initial Setup
Carefully unpack your Nikon Coolpix P500‚ verifying the box contains the camera body‚ battery‚ battery charger‚ USB cable‚ and this user manual. Inspect all items for any physical damage sustained during shipping. Before first use‚ remove any protective plastic films from the camera and lens.
Initial setup involves setting the date‚ time‚ and preferred language. Power on the camera and follow the on-screen prompts to configure these basic settings. Register your camera online with Nikon to benefit from warranty support and potential software updates. Familiarize yourself with the camera’s external controls and ports‚ noting their locations for easy access during operation. Ensure the lens is clean before taking your first pictures!
Charging the Battery
To charge the battery‚ connect the supplied battery charger to a standard wall outlet. Insert the EN-EL5 battery into the charger‚ ensuring correct polarity as indicated by the markings. The charger’s LED indicator will illuminate‚ typically red during charging and green when fully charged.
A full charge typically takes approximately 3-4 hours. Avoid interrupting the charging process. Nikon recommends using only the supplied charger to prevent damage to the battery. Do not expose the battery to extreme temperatures or moisture. A fully charged battery provides ample power for numerous shots and video recordings‚ allowing extended use of your Coolpix P500.
Inserting Memory Card (SD/SDHC)
To insert a memory card‚ locate the card slot door on the side of the camera. Open the door and insert either an SD or SDHC card‚ ensuring the card’s gold contacts face downwards and align with the slot. Gently push the card in until it clicks into place.
Avoid forcing the card; if it doesn’t insert smoothly‚ check the orientation. To remove the card‚ gently press it inwards once to release it‚ then pull it out. Always handle memory cards with care‚ avoiding static electricity and magnetic fields. Using a compatible card is crucial for storing your photos and videos effectively with the Coolpix P500.

Understanding the Camera Controls
Familiarize yourself with the P500’s buttons and dials – power‚ mode dial‚ shutter‚ zoom‚ menu‚ and function – for seamless operation and control.
Power Button and Mode Dial
The Power Button‚ typically located on the top panel‚ initiates and terminates camera operation. A firm‚ yet gentle press is all that’s needed to awaken the P500 from its slumber or power it down completely. Adjacent to the power button resides the Mode Dial‚ a crucial control for selecting the desired shooting mode.
This dial offers a range of options‚ from fully automatic settings ideal for beginners to more advanced modes like Program Auto (P)‚ Aperture Priority (A)‚ Shutter Priority (S)‚ and Manual (M). Scene modes‚ such as Portrait‚ Landscape‚ and Sports‚ are also readily accessible via the Mode Dial‚ allowing for optimized settings tailored to specific shooting scenarios. Rotating the dial clicks into each mode‚ providing tactile feedback and ensuring accurate selection. Understanding these modes is fundamental to unlocking the full potential of your Coolpix P500.
Shutter Button and Zoom Control
The Shutter Button is central to capturing images. Pressing it halfway activates autofocus‚ ensuring your subject is sharp before fully depressing it to take the picture. A responsive shutter button is key for capturing fleeting moments. Surrounding the shutter button is the Zoom Control‚ a lever-style mechanism that allows for precise adjustments to the camera’s impressive 22.2x optical zoom.
Moving the zoom control towards the ‘W’ (wide-angle) setting decreases magnification‚ capturing a broader scene. Conversely‚ moving it towards the ‘T’ (telephoto) setting increases magnification‚ bringing distant subjects closer. Smooth‚ controlled zooming is essential for composing compelling shots. The speed of zooming can be adjusted within the camera’s settings for enhanced control and creative effects.
Menu Button and Navigation
The Menu Button‚ typically marked with an icon resembling stacked lines‚ grants access to the camera’s extensive settings and customization options. Pressing this button displays the main menu on the LCD screen‚ categorized for ease of use. Navigation through the menu is achieved using the directional pad (D-pad) located adjacent to the menu button.
The D-pad allows you to scroll up‚ down‚ left‚ and right‚ highlighting different menu items. Pressing the center ‘OK’ button selects the currently highlighted option. Many menus feature sub-menus‚ navigated in the same manner. Understanding the menu structure is crucial for tailoring the P500 to your shooting preferences‚ adjusting image quality‚ and exploring advanced features like white balance and ISO sensitivity.
Function Button Customization
The Nikon Coolpix P500 features a dedicated Function (FN) button‚ offering a powerful way to personalize your shooting experience. This button‚ when pressed‚ displays a set of frequently used settings directly on the LCD screen‚ providing quick access without navigating through the main menu. Customization of these displayed functions is possible through the camera’s setup menu.
You can assign various settings to the FN button‚ such as ISO sensitivity‚ white balance‚ autofocus mode‚ image quality‚ and exposure compensation. This allows you to tailor the camera to your preferred shooting style and quickly adjust settings on-the-fly. Experimenting with different assignments will significantly improve your workflow and responsiveness in diverse photographic situations.
Shooting Modes Explained
The P500 offers diverse shooting modes‚ from fully automatic options for beginners to advanced manual controls for experienced photographers‚ enhancing creative flexibility.
Auto Mode for Beginners
Auto mode is the simplest way to start taking pictures with your Nikon Coolpix P500. In this mode‚ the camera automatically selects the optimal settings for the current lighting conditions and scene. This includes adjusting the exposure‚ white balance‚ and focus.
To use Auto mode‚ simply turn the mode dial to the “AUTO” position. The camera will then analyze the scene and make the necessary adjustments. This mode is ideal for everyday snapshots and situations where you don’t have time to fiddle with complex settings.
While in Auto mode‚ the camera prioritizes ease of use‚ ensuring sharp and well-exposed images with minimal effort from the user. It’s a fantastic starting point for those new to digital photography or wanting a quick and reliable shooting experience.
Scene Modes (Portrait‚ Landscape‚ Sports‚ etc.)
The Nikon Coolpix P500 offers a variety of Scene Modes designed to optimize camera settings for specific shooting situations. These pre-programmed settings simplify photography‚ delivering improved results without manual adjustments. Portrait mode softens backgrounds and enhances skin tones for flattering portraits.
Landscape mode prioritizes sharpness and vibrant colors‚ ideal for capturing scenic views. Sports mode utilizes faster shutter speeds to freeze motion‚ perfect for action shots. Other modes include Night Portrait‚ Party‚ Beach‚ and Snow‚ each tailored to unique conditions.
To access Scene Modes‚ rotate the mode dial to the “SCN” position and use the directional buttons to select the desired mode. These modes are a great step beyond Auto‚ offering more control while remaining user-friendly.
Program Auto Mode (P)
Program Auto (P) mode on the Nikon Coolpix P500 offers a balance between automatic convenience and creative control. Unlike full Auto mode‚ P mode allows you to adjust several settings while the camera automatically determines the appropriate aperture and shutter speed for optimal exposure.
You can modify settings like ISO sensitivity‚ white balance‚ exposure compensation‚ and flash settings. This provides flexibility for fine-tuning images without the complexity of fully manual operation. P mode is excellent for situations where you want some control but don’t need to set aperture or shutter speed directly.
To select P mode‚ rotate the mode dial to the “P” position. Experiment with the adjustable settings to understand their impact on your photographs and enhance your creative vision.
Aperture Priority Mode (A)
Aperture Priority (A) mode on the Nikon Coolpix P500 grants you control over the lens aperture‚ influencing depth of field. The camera automatically selects the shutter speed to achieve proper exposure. A wider aperture (lower f-number like f/2.8) creates a shallow depth of field‚ ideal for portraits with blurred backgrounds.
Conversely‚ a narrower aperture (higher f-number like f/8) increases depth of field‚ keeping more of the scene in focus – perfect for landscapes. Adjust the aperture using the control dial while in A mode.
This mode is beneficial when you prioritize controlling the aesthetic quality of the background blur or ensuring sharpness throughout the entire image. Experiment to master depth of field!
Shutter Priority Mode (S)
Shutter Priority (S) mode on your Nikon Coolpix P500 allows you to dictate the shutter speed‚ controlling how motion is captured. The camera automatically adjusts the aperture for correct exposure. Faster shutter speeds (e.g.‚ 1/1000s) freeze action‚ ideal for sports or wildlife photography‚ preventing motion blur.
Slower shutter speeds (e.g.‚ 1/30s) blur motion‚ creating a sense of movement or allowing more light into the camera for low-light situations. Use the control dial to select your desired shutter speed while in S mode.
This mode is excellent when you need to precisely control the depiction of motion‚ whether freezing a fast-moving subject or intentionally blurring it for artistic effect.
Manual Mode (M)
Manual (M) mode grants you complete creative control over your Nikon Coolpix P500. You independently set both the aperture and shutter speed‚ allowing for precise exposure adjustments tailored to your artistic vision. This mode requires a solid understanding of the exposure triangle – aperture‚ shutter speed‚ and ISO.
Adjust aperture for depth of field control; a wider aperture (lower f-number) creates shallow depth of field‚ blurring the background‚ while a narrower aperture (higher f-number) increases depth of field‚ keeping more in focus.
Mastering M mode unlocks the full potential of your camera‚ enabling you to capture images exactly as you envision them‚ regardless of the camera’s automatic settings.

Focusing and Image Settings
Explore autofocus options‚ focus area selection‚ and crucial image settings like resolution‚ compression‚ ISO‚ and white balance for optimal results.
Autofocus Modes (Single‚ Continuous‚ Manual)
The Nikon Coolpix P500 offers three distinct autofocus (AF) modes to suit various shooting scenarios. Single AF (AF-S) is ideal for stationary subjects‚ locking focus when the shutter button is half-pressed. Continuous AF (AF-C) tracks moving subjects‚ continuously adjusting focus as they move – perfect for sports or wildlife.
Manual Focus (MF) grants complete control over focusing‚ allowing precise adjustments using the focus ring on the lens. This is beneficial for macro photography or situations where autofocus struggles. Switching between modes is easily done through the camera’s menu. Understanding when to utilize each mode significantly enhances image sharpness and overall photographic success with the P500.
Focus Area Selection
The Nikon Coolpix P500 provides several focus area selection options‚ empowering you to precisely control where the camera prioritizes focus. Auto-area AF automatically selects focus points across the frame‚ suitable for general photography. Center-area AF focuses on the central portion of the image‚ useful for portraits or subjects in the middle.
Dynamic-area AF allows you to select a focus point‚ and the camera will continue to track the subject even if it moves slightly. Manual focus point selection lets you choose a specific point for ultimate control. Experimenting with these options ensures sharp focus on your intended subject‚ enhancing image quality and creative possibilities.
Image Quality Settings (Resolution & Compression)
The Nikon Coolpix P500 offers versatile image quality settings‚ allowing you to balance file size and detail. Resolution determines the image size in pixels; higher resolutions capture more detail‚ ideal for large prints or cropping. Compression affects file size – Fine compression retains maximum detail‚ while Normal compression reduces file size with a slight quality loss.
Selecting the appropriate settings depends on your needs. For web use or email‚ Normal compression and a lower resolution may suffice. For professional prints or significant editing‚ choose Fine compression and the highest resolution. Understanding these options ensures you capture images optimized for their intended purpose‚ maximizing storage efficiency and visual fidelity.
ISO Sensitivity Adjustment
ISO sensitivity controls the camera’s sensitivity to light. Lower ISO settings (e.g.‚ 80‚ 100) are ideal for bright conditions‚ producing cleaner images with minimal noise. Higher ISO settings (e.g.‚ 800‚ 1600‚ 3200) are crucial in low-light situations‚ allowing for faster shutter speeds to prevent blur‚ but introduce more image noise.
The Nikon Coolpix P500’s Auto ISO mode intelligently selects the optimal setting. However‚ manual control provides creative flexibility. Increasing ISO in dim environments enables handheld shooting without a flash‚ preserving ambient light. Be mindful that excessively high ISO values can degrade image quality‚ so balance sensitivity with acceptable noise levels for your desired outcome.
White Balance Control
White balance (WB) ensures accurate color rendition by compensating for different lighting conditions. Incorrect WB results in color casts – images appearing too warm (yellowish) or cool (bluish). The P500 offers several WB presets‚ including Auto‚ Daylight‚ Cloudy‚ Fluorescent‚ and Incandescent.
Auto WB generally performs well‚ but manual selection provides greater control. For example‚ choosing ‘Fluorescent’ indoors corrects the greenish tint often produced by fluorescent lights. Custom WB allows you to set a precise balance using a white or gray card. Experimenting with WB creatively can also achieve artistic effects‚ intentionally altering color tones for stylistic impact.
Advanced Features and Settings
Explore the P500’s powerful capabilities‚ including its impressive 22.2x optical zoom‚ Vibration Reduction (VR) for sharp images‚ and high-definition video recording options.
Optical Zoom Capabilities (22.2x)
The Nikon Coolpix P500 boasts an impressive 22.2x optical zoom lens‚ offering a versatile focal length range of 22.5-500mm (equivalent to 35mm format). This substantial zoom capability allows photographers to capture detailed images of distant subjects without sacrificing image quality‚ a key advantage over digital zoom.
Utilizing the zoom control‚ users can smoothly transition between wide-angle shots for landscapes and telephoto reach for wildlife or sports photography. The lens construction incorporates Nikon’s technologies to minimize distortion and chromatic aberration throughout the zoom range. Furthermore‚ the zoom function is integrated with the camera’s image stabilization system (VR) to help reduce blur caused by camera shake‚ especially at longer focal lengths.
Mastering the zoom is crucial for maximizing the P500’s potential‚ enabling creative compositions and capturing subjects that would otherwise be out of reach.
Image Stabilization (VR) System
The Nikon Coolpix P500 incorporates a Vibration Reduction (VR) system‚ a crucial feature for achieving sharp images‚ particularly in low-light conditions or when using the camera’s powerful zoom. VR technology effectively minimizes blur caused by camera shake‚ allowing for handheld shooting at slower shutter speeds.
This system works by compensating for camera movement‚ shifting lens elements to counteract vibrations. The P500 offers different VR modes‚ allowing users to optimize performance based on shooting conditions. Selecting the appropriate VR mode – such as Normal or Active – ensures optimal stabilization for various scenarios‚ including static subjects or dynamic action.
Understanding and utilizing the VR system is essential for capturing clear‚ detailed images‚ especially when maximizing the camera’s zoom capabilities and shooting in challenging environments.
HD Video Recording
The Nikon Coolpix P500 boasts impressive HD video recording capabilities‚ allowing users to capture high-quality moving images with ease. The camera supports 720p HD video recording at 30 frames per second‚ delivering smooth and detailed footage. Accessing video mode is straightforward via the mode dial‚ enabling quick transitions between still photography and videography.
During video recording‚ the optical zoom can be utilized‚ providing flexibility in framing shots. However‚ it’s important to note that the full zoom range may not be available during video capture. The built-in microphone captures audio‚ though external microphone options are not supported.
Experimenting with different shooting modes and utilizing the VR system during video recording will enhance the overall quality and stability of your videos.
Connectivity Options (USB‚ HDMI)
The Nikon Coolpix P500 offers versatile connectivity options for transferring images and videos to other devices or displaying them on larger screens. A standard USB port facilitates a direct connection to computers‚ enabling quick and easy file transfer for editing or storage. The camera is recognized as a mass storage device‚ simplifying the process.
For high-definition viewing‚ the P500 features an HDMI port. Connecting the camera to an HDTV allows you to showcase your photos and videos in stunning detail on a larger display. Ensure you have the appropriate HDMI cable for a secure connection.
These connectivity features enhance the overall usability of the camera‚ making it convenient to share and enjoy your captured memories.

Troubleshooting Common Issues
This section addresses frequent problems encountered with the Nikon Coolpix P500‚ offering solutions for issues like power failures‚ card errors‚ and image quality concerns.
Camera Not Turning On
If your Nikon Coolpix P500 fails to power on‚ begin by verifying the battery charge. Ensure the battery is correctly inserted into the compartment and hasn’t depleted. Try charging the battery for at least two hours‚ even if it indicates some charge remaining‚ as the indicator may be inaccurate.
Next‚ check the power button itself for any physical obstructions or damage. Press it firmly and hold for a few seconds. If the camera still doesn’t respond‚ attempt to reset the camera by removing the battery and any memory cards‚ then reinserting them after a short interval.
In rare cases‚ a corrupted firmware update can cause this issue. Consult the Nikon support website for potential firmware updates or recovery procedures. If none of these steps resolve the problem‚ professional repair may be necessary.
Memory Card Errors
Encountering memory card errors with your Nikon Coolpix P500 can be frustrating. First‚ ensure you’re using a compatible SD or SDHC card‚ formatted correctly for the camera. The P500 may not recognize cards with insufficient capacity or incorrect formatting. Try reformatting the card within the camera – this often resolves minor errors.
If the error persists‚ test the card in another device (computer card reader‚ another camera) to determine if the card itself is faulty. A damaged or corrupted card should be replaced. Avoid removing the card during image transfer or shooting‚ as this can lead to data loss or card corruption.
Finally‚ check for physical damage to the card’s contacts. Clean them gently with a soft‚ dry cloth. If the camera continues to display errors‚ consult the Nikon support website for further assistance.
Image Quality Problems
Experiencing subpar image quality with your Nikon Coolpix P500? Several factors could be at play. First‚ verify your image quality settings – ensure you haven’t accidentally selected a low resolution or high compression setting. Higher resolutions and lower compression result in larger file sizes but superior detail.
Check your ISO setting; higher ISO values introduce more noise‚ especially in low light. Utilize the image stabilization (VR) feature to minimize blur caused by camera shake. Ensure the lens is clean‚ as smudges or fingerprints significantly impact image clarity.
Finally‚ review your white balance settings to ensure accurate color reproduction. Incorrect white balance can lead to unnatural color casts. Experiment with different scene modes to optimize settings for specific shooting conditions.